In this part we will cover some more advanced networking connectivity and this is the part were it gets slightly more complex. In part 3 we talked about making HTTP-POST requests instead of GET requests, because of the extra payload we get. On most Android devices the Internet connection might not be as stable as on a Windows computer. They might be moving around without connectivity, have no data plan or have really bad bandwidth. This is a problem if you want to get a lot of data from the device (e.g. all photos). Although most devices tend to have WiFi connectivity from time to time, which gives us a high bandwidth uplink. So we will now cover how to detect if we are WiFi connected and if we are charging (to cover battery usage tracks).
Let us add a new class called DeviceLocation.java and add the method IsWiFiAvailable:
public boolean IsWiFiAvailable(Activity a){
    ConnectivityManager connectivity = (ConnectivityManager) a.getSystemService(Context.CONNECTIVITY_SERVICE);
    if (connectivity == null) return false; // as of the API, this can only happen if the name does not exist, but we try to evade even this

    NetworkInfo activeNetwork = connectivity.getActiveNetworkInfo(); // requires ACCESS_NETWORK_STATE
    if (activeNetwork.isConnected() && activeNetwork.getType()==ConnectivityManager.TYPE_WIFI) {
      return true; // return true only if WiFi and active
    }
    return false;
  }
As you can see, we check if there is a active connection and what type of connection it is. The API is very well documented and usefull here. I’ve seen many bad examples how people are doing this check, so I documented this part of the code slightly more than other parts. We also add the needed permission, here ACCESS_NETWORK_STATE:
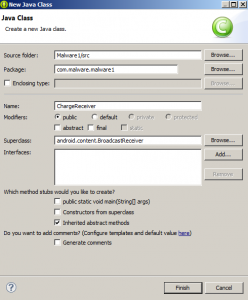
In the introduction I said we are going to do the WiFi connection only when the device is charging to prevent battery draining. This is established quite easy in Android, since it has a Broadcast for “charging”. Lets create a new class with superclass BroadcastReceiver and name it ChargeReceiver.java:
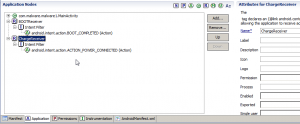
And tell Android to run it on ACTION_POWER_CONNECTED:
Luckily the ACTION_POWER_CONNECTED receiver needs no extra permissions.
As you might already have guessed, this class will be run whenever the device is charging. I assume that most devices charging might be at home where they have a WiFi connection, so heavy operations can be done then.
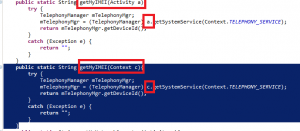
Lets add some code to ChargeReceiver that will check for WiFi connectivity and pass the IMSI and IMEI as in our previous examples. There is a little modification that we have to do. Our PhoneInfo class takes the current Activity as parameter, but we have no Activity in ChargeReceiver. If you’re unfamiliar with those types, imagine the Activity beeing something that is active and visible to the user, while Context is something internal. This is further than I want to go in this tutorial, so lets just edit our PhoneInfo class in order to work with Activity AND Context. We create a copy of the methods that take Context as argument:
Now we can use our WebHelper.SendToWebserver() inside ChargeReceiver:
In order to test it, connect to WiFi while not charging the device, then connect the charger and watch your server logs.


